

Grinding a knife blade on a belt grinder
- Keld Lisby Hansen

- Nov 27, 2025
- 4 min read
This guide describes the complete process of making a knife blade from Damascus steel – from sketching and transferring the design to the steel, through rough and fine grinding, bevel shaping, and detailing, until the blade is ready for hardening. It shows how to weld the tang on, mark the centerline, use a jig for precise bevels, and gradually grind with finer belts. Finally, the last details on the bevel are finished, and the stamp is applied before the blade is hardened. The guide combines practical workflows, correct tool selection, and small craftsmanship details to ensure a professional result.

I start by designing and drawing the blade I want to make on a piece of paper. Draw everything, including the tang. I often use the same blade shape for my knives, so I have created a template in a thin brass plate. This allows me to reuse it again and again. I then transfer the drawing to the steel. I "paint" the steel with a strong permanent marker and trace the outline with a scribe. This way, the lines remain visible throughout the work. If you draw the outline with just a marker, the heat from grinding and water from cooling will remove the lines.
For this blade, I use a piece of Damascus steel from Balbach. Therefore, I do not cut out the tang from this steel. It is quite expensive, and there is no reason to use it for the tang, which will just be glued into the handle. I weld the tang on using a different piece of steel, which I will explain more about later.
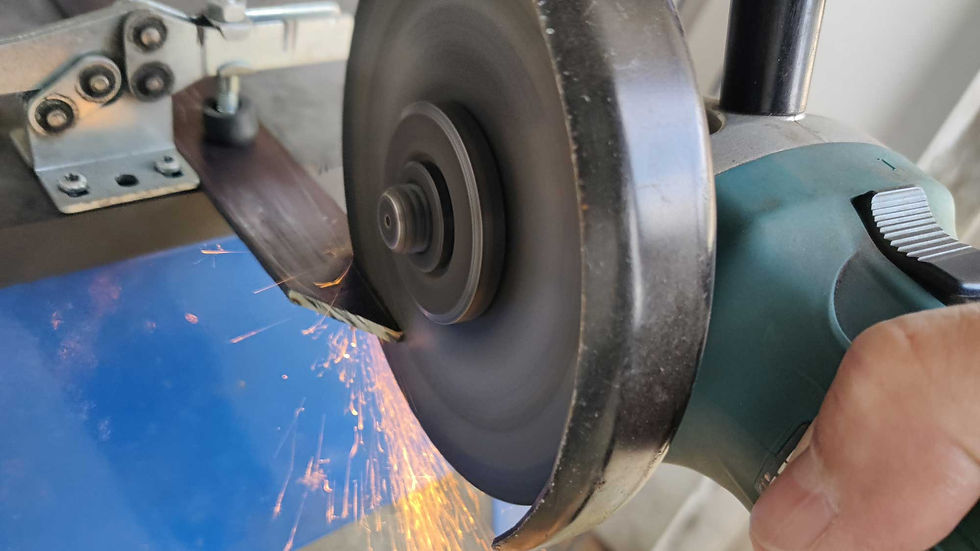
I clamp the steel securely so I can cut out the blade with an angle grinder. Remember safety equipment – goggles and ear protection are a must when using an angle grinder.
Next, I remove the excess steel with the angle grinder. I cut as close to the lines as possible – this leaves less material to grind away on the belt grinder.

The blade is now roughly cut out. The scribe lines are still clearly visible.

Now I can weld the tang onto the blade itself. I weld it using a welder with flux-cored wire, which works very well. If you are using other types of steel that are not Damascus, it is usually easier to grind the tang together with the rest of the blade so it forms a single piece.
Once the tang is welded, I grind down the weld so that the tang is flush with the rest of the blade. This is just a rough leveling for now.

Next, I shape the blade on the belt grinder. I use a coarse belt that removes material quickly. My belt grinder has electronic speed control, so I run it as fast as possible. It doesn’t matter if the steel becomes hot and bluish at this stage – heat and discoloration are only a concern after hardening and tempering. I mark the transition to the handle with a scribe so the line is perfectly straight.
The blade is now rough-ground all around. I grind the tang thinner than the knife blade itself, which will make it easier to fit into the handle later.

Next, I can flatten the blade surfaces. I use a strong magnet to hold the blade. I grind on the flat grinding area of the belt grinder using a belt with P120 grit. When buying steel, it is usually reasonably straight, but if it is a hand-forged blade where scale needs to be removed, a coarser belt can be used initially.

When grinding the bevels on a blade, you must first mark the centerline. I cover the base of the blade with marker, as before. There are several ways to mark the line, and special tools exist, but I use a standard drill that is 0.5 mm smaller than the blade thickness. I place the blade on a flat surface – ideally a granite slab or piece of glass – and run the drill along the blade edge like a scribe. This creates a visible line in the marker. I mark from both sides, leaving a small gap between the lines, which is what I grind to when shaping the bevel.

To grind the bevel, I use a jig to hold the blade. It consists of a piece of angle iron with a bolted base plate that protrudes 2 mm at the bottom. I clamp the blade to the jig with a welding clamp, with the spine of the blade against the base. This allows me to grind the bevel. I grind one side at a time, using the lines as a guide. I use a Ø250 mm contact wheel to create a slightly hollow bevel. I angle the jig to match the desired bevel angle and grind the blade back and forth on the belt. I start with a coarse belt to remove material quickly. Once one side is done, I flip the blade and grind the other side. I grind only to the lines, leaving a small flat in the middle. This is intentional; the edge must not be fully ground together yet, as it could “curl” during hardening.

It is very important that the bevel starts at the same point on both sides so the edge is symmetrical. With the jig, this is easy to control. If making a top bevel, the process is the same as for the main bevel, though I do not grind it as high.
After the bevel is ground all around, I refine it with progressively finer belts, starting with P80 and finishing with P400. It is easier to do this before hardening, since extra care is needed after the blade is hardened.

Once the blade is fully ground, I add the final details before hardening. On the bevel, I usually round the edges slightly with a file, which gives a nice finish and looks very clean. The top bevel receives the same rounding.

Finally, I apply my stamp. This is easiest to do before hardening, as the steel is still soft. For larger stamps, it may be helpful to stamp while the blade is heated.
After this, the blade is ready for hardening. The hardening process is described in a separate guide.


Comments